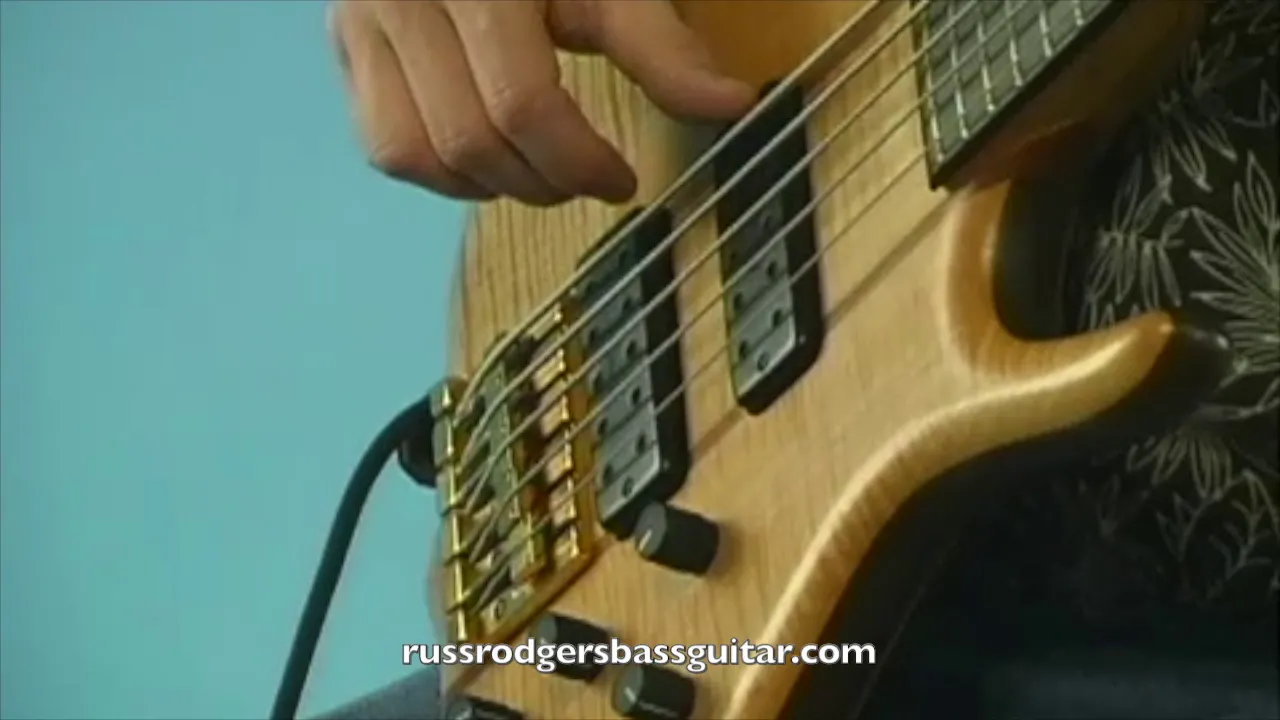
I look at the 5-string as a 4-string with one more string to keep quiet, because that low B hands you the notes but it also hands you one more string sitting there ready to ring along with everything else you play. Clean playing on a 5-string comes down to muting, and if the strings you are not playing are ringing underneath you, nothing else you do is going to sound good. What you want is a right-hand shape that anchors the thumb, mutes with rest strokes, and works together with a light left-hand touch, so that even your open-string drills sound musical while you are working on them.
Quieting the strings with your left hand
When you do these open-string exercises on a 5-string, you will run into the strings overringing each other as you come down from the higher strings to the lower ones, and all of that piled on top of itself is not a very pleasant sound to listen to. Before you start in on the right hand, lightly lay your left-hand first finger down between the nut and the first fret. Don't press down like you're fretting a note. Just touch the strings lightly, enough to mute the overringing but not so much that the pitches disappear, and you can slide the finger a little forward or a little backward until you get the sound you want.
This does not really affect the right-hand form or anything, it just makes the exercises nicer to listen to while you are working on them.
Right-hand position and thumb anchoring
The first thing to avoid is resting your arm on the bass. Any pressure from the hand or the arm on the instrument interferes with mobility, and it can put enough pressure on the veins in your arm to make your actual fingers go numb if you put too much down there. Your arm should be floating just over the instrument.
Next, anchor your thumb on the pickup when you are playing on the B string. I recommend not sitting on the lip of the pickup, because it is a comfortable anchor but it really does get in the way of the muting I am about to show you, and resting the thumb on the body of the pickup works a lot better. Also, trim your right-hand thumbnail back so that the fleshy part of the thumb is what contacts the pickup, because if a nail hits it, it'll slide around and won't grip very well.
From there, the thumb moves one string behind whatever you are playing:
- Playing the B, the thumb sits on the pickup.
- Playing the E, the thumb sits on the B.
- Playing the A, the thumb sits on the B and E.
- Playing the D, the thumb sits on the B, E, and A.
- Playing the G, the thumb sits on the B, E, and A (touching the D keeps the hand more relaxed).
The rest stroke off the G keeps the D string quiet, so the thumb does not strictly have to mute the D, but you can lift the thumb and sit on the B, E, and D while you play the G if that feels better to you. Then it goes right back to the lower strings. The thumb is just a string behind what you're playing.
Finger movement mechanics
Keep the hand in the same shape as you move across the strings, and keep it very, very relaxed. When you pick a note, let the finger glide over the top of the string, grip the string, and pull it, keeping tension in those two joints of the finger the whole way through. Don't let them buckle in or collapse backwards. If you let them collapse, you lose the energy, you do not get as much power out of the finger, and you do not get as good a tone either.
Also avoid going out and over the string. You want to reach over it, grip it, and pull it, rather than scooping around it. Try it both ways and listen to what happens to your tone!
Three exercises on open strings
Use these to drill the form on open strings with the left-hand damping in place. You don't have to worry about doing them in time or with a metronome yet, just get the form down first, one string at a time, adjusting the movements as you go. Also, we want to alternate the right-hand fingers, so count "one-two-one-two" going up and down several times, and then switch over to "two-one-two-one" so that both fingers learn to lead.
- Four notes per string. Play four notes on each open string from B to G and back, alternating one-two-one-two. Then repeat with two-one-two-one alternation.
- Two notes per string. Same idea, two notes per string going up and down. One-two alternation first, then a two-one alternation.
- One note per string. Single notes across all five strings, first with one-two alternation, then with two-one alternation.
Take these real slow and keep your eye on the form rather than on the speed. Once the hand knows what to do on its own, a lot of that string noise on the 5-string just quits showing up, and that is a great feeling!!
Key takeaways
- A light first finger laid between the nut and the first fret takes the overringing out of your open-string drills.
- Let the arm float over the instrument rather than resting it on the bass.
- The thumb stays one string behind whatever you're playing, with rest strokes handling the rest.
- Keep tension in the finger joints so they don't collapse, and pull through the string rather than scooping around it.
Right-hand technique is one of the fundamentals I teach, and form on a 5-string is worth getting right early, because the muting habits you build here carry into every line you play. For a companion piece on which fingers go where, see smart choices for right-hand fingering. If you'd like personalized feedback on your thumb position and finger mechanics, online bass lessons via Zoom are available.
Read the transcript
Hey, and hope you're doing well today. Russ Rodgers back with you with some cool exercises that will get your right hand working cleanly and efficiently on the 5-string bass. So get your bass out, tuned up, and we'll get started.
Today I'll be showing you some right-hand exercises that will teach your hand to get rid of some string-ring problems you may have been running into on the 5-string. First, let's look at how to position the left hand while doing the right-hand exercises.
When doing the open-string exercises, you will run into problems coming down from the higher strings to the lower strings, or the strings overringing each other, which is not a very pleasant sound. So to make these exercises nicer to listen to while you're working on them, if you just lightly lay your first finger between the nut and the first fret, it will mute the strings enough so that you'll be able to hear the pitches but get rid of the overringing. You can just move it back — a little forward or a little backward — to get the sound that you want. Just lightly touch down, but don't press down like you're fretting the notes. You're just lightly touching, and you should get this kind of sound here as you go up and down the strings. Remember, this is just to make it nicer to listen to as you're working on these exercises. This doesn't really affect the right-hand form or anything.
Now let's take a look at right-hand form, picking, and muting. The first thing we want to avoid doing is resting our arm on the bass. We don't want to put any pressure of the hand or the arm on the instrument, because this will interfere with mobility, as well as putting pressure on those veins in the arm so that you can cause your actual fingers to go numb if you put too much down here. So your arm should be floating just over the instrument.
The second thing: we'll start with putting our thumb resting right on the pickup here when playing on the B string. I recommend not sitting on the lip here. If it's a comfortable anchor, it really does interfere with the muting techniques I'm going to show you, so resting the thumb here is better. Also, trimming the thumbnail on the right hand so that the fleshy part of the thumb contacts the pickup — because if a nail hits it, it'll slide around and won't grip very well. You don't have to just keep your hand on this pickup; you will be able to eventually move the hand this way and this way depending on what kind of sound you get, but this is a good place to start to get comfortable with the actual form of the right hand.
So the idea is to basically keep our hand in this shape as we move up and down the strings, keeping it very, very relaxed. If I were going to play a B string note, when I pick the note I want my finger to glide over the top of the string, grip the string, keeping tension in these two joints of the finger — not letting them buckle in or collapse. You don't want them to buckle in backwards like this; you want to keep tension in those joints and let the string slide out from underneath the finger. Because if you let them collapse, you lose the energy, and you don't get as much power out of the finger, and you also don't get as good a tone. Also avoid going out and over. You want to just reach over the string, grip it, and pull it.
As you go to the E string from the B, your thumb will sit on top of the B like this, and then you'll pick the E string, allowing the fingers to fall firmly against the string behind it. When I go to the A string, my thumb follows up, and it's now sitting on the B and the E while I'm picking the A. When I go to the D, my thumb follows up, now sitting on the B, E, and A while I'm picking the D. And finally, when I go to the G, my thumb is sitting on the B, E, and A, which are really the critical ones here. I like to have mine touching the D because it does help keep my hand more relaxed in this position without reaching with a finger. But as far as the muting goes, the rest stroke off the G will keep the D string quiet. You can lift the thumb, sit on the B, E, and D while you play on the G, and then it should go back to the lower strings. The thumb is just a string behind what you're playing.
Now for exercise one. In this exercise we're going to do four notes per string on the open strings using the right-hand form we just discussed. You don't have to worry about doing these in time or with a metronome — eventually, once you get the form down, that would be fine, but to get started really just take one string at a time, adjusting the movements as you go. Also, we want to alternate our right-hand fingers. I suggest counting one-two-one-two several times going up and down, and then two-one-two-one. This will help facilitate the alternation of the right-hand fingers.
Exercise number one: one-two, one-two, one-two, one-two, one-two, one-two, one-two, one-two, one-two, one-two, one-two, one-two, one-two, one-two. Now two-one alternation: two-one, two-one, two-one, two-one, two-one, two-one, two-one, two-one, two-one, two-one.
Let's look at exercise two. In exercise number two we have two notes per string. We want to alternate one-two, one-two going up and down, and then go back and do a two-one alternation. Here we go: one-two, one-two, one-two, one-two, one-two, one-two, one-two, one-two, one-two, one-two. Now two-one alternation: two-one, two-one, two-one, two-one, two-one, two-one, two-one, two-one, two-one, two-one.
Now let's check out exercise three. In this one we're going to do one note per string, first doing a one-two alternation and then a two-one alternation. One-two, one-two, one, one-two, one-two, one. Then two-one alternation: two-one, two-one, two, two-one, two-one, two.
Thanks for joining me today, and I hope these exercises will help you in working up your right-hand technique. Don't forget.